Create a real-time chat application by using JavaScript
Building a real-time chat application involves multiple components, including server-side code, client-side code, and a communication protocol such as WebSocket. Below is an example of how you can create a real-time chat application using JavaScript, HTML, and Node.js with the help of the Socket.io library.
Server-side (Node.js):
First, you'll need to set up a server to handle the chat functionality. Create a new file called `server.js` and add the following code:
javascript
const express = require('express');
const app = express();
const http = require('http').Server(app);
const io = require('socket.io')(http);
app.use(express.static(__dirname + '/public'));

io.on('connection', (socket) => {
    console.log('A user connected');

    socket.on('chat message', (msg) => {
        io.emit('chat message', msg);
    });

    socket.on('disconnect', () => {
        console.log('A user disconnected');
    });
});

http.listen(3000, () => {
    console.log('Server is running on http://localhost:3000');
});
This code sets up an Express server, serves the static files in the `public` directory, and initializes a Socket.io instance. When a user connects, the server logs a message. When the server receives a chat message from a user, it emits the message to all connected users. Finally, when a user disconnects, the server logs a message.
Client-side (HTML/JavaScript):
Next, create an HTML file called `index.html` and add the following code:
html
<!DOCTYPE html>
<html>
<head>
    <title>Real-time Chat</title>
    <style>
        body {
            display: flex;
            justify-content: center;
            align-items: center;
            height: 100vh;
            margin: 0;
            font-family: Arial, sans-serif;
        }

        #messages {
            list-style-type: none;
            padding: 0;
        }

        #messages li {
            margin-bottom: 10px;
        }

        #message-input {
            width: 300px;
        }
    </style>
</head>
<body>
    <ul id="messages"></ul>
    <form id="message-form">
        <input id="message-input" autocomplete="off" />
        <button>Send</button>
    </form>

<script src="/socket.io/socket.io.js"></script>
<script>
    const socket = io();

    document.getElementById('message-form').addEventListener('submit', (e) => {
        e.preventDefault();
        const messageInput = document.getElementById('message-input');

        const message = messageInput.value.trim();
        if (message) {
            socket.emit('chat message', message);
            messageInput.value = '';
        }
    });

    socket.on('chat message', (msg) => {
        const messages = document.getElementById('messages');
        const li = document.createElement('li');
        li.textContent = msg;
        messages.appendChild(li);
    });
</script>
</body>
</html>
This code sets up the client-side code for the chat application. It includes an unordered list (`<ul>`) to display the chat messages, a form to submit new messages, and a script tag to handle the JavaScript functionality.
In the JavaScript code, we initialize a Socket.io instance and connect to the server. When the user submits a message, the client emits a `chat message` event to the server. When the client receives a chat message from the server, it appends the message as a new list item (`<li>`) to the message list (`<ul>`).
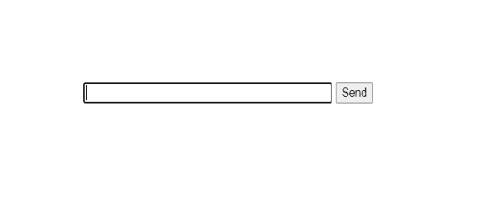
Output:

About the Author
Silan Software is one of the India's leading provider of offline & online training for Java, Python, AI (Machine Learning, Deep Learning), Data Science, Software Development & many more emerging Technologies.
We provide Academic Training || Industrial Training || Corporate Training || Internship || Java || Python || AI using Python || Data Science etc


